When temperatures begin to drop, you may notice something you didn’t pay much attention to during the summer: cold air sneaking into your home around windows and doors.
A small draft may not seem like a major problem, but multiple air leaks can make certain rooms uncomfortable and cause your heating system to work harder to maintain the temperature you want.
The good news is that many common drafts are relatively easy and inexpensive to address. Replacing worn weatherstripping, adding a door sweep, or sealing a small gap with the appropriate caulk can make a noticeable difference.
But before you start applying caulk or buying weatherstripping, it’s important to find out where the draft is actually coming from.
Here’s how to find and seal common air leaks around your home’s windows and exterior doors before winter.
Quick Draft-Proofing Checklist
Before cold weather arrives:
☐ Check all exterior doors for drafts
☐ Inspect window frames and trim
☐ Look for cracked or missing caulk
☐ Check worn or damaged weatherstripping
☐ Inspect door thresholds
☐ Check the bottom of exterior doors
☐ Look for gaps around window frames
☐ Inspect sliding patio doors
☐ Check utility penetrations in exterior walls
☐ Seal appropriate small gaps
☐ Replace damaged weatherstripping
☐ Consider professional help for major air leaks or damaged windows and doors
1. Find the Draft Before You Try to Fix It
The first rule of draft-proofing is simple:
Don’t seal something just because it looks like a gap. Find out where the air is actually entering.
Walk around your home on a cold or windy day and pay attention to areas around windows and doors.
You may be able to feel a noticeable stream of cold air with your hand.
You can also carefully use a smoke pencil or incense stick to help identify air movement around suspected leaks. Keep anything producing a flame or smoke away from curtains, furniture, children, pets, and other combustible materials.
Pay particular attention to:
- Window edges
- Door frames
- Door thresholds
- The bottom of exterior doors
- Sliding patio doors
- Areas around trim
- Gaps where utilities enter exterior walls
Finding the actual source first can save you time, money, and a lot of unnecessary caulking.
2. Check Your Exterior Doors
Exterior doors are one of the most obvious places to look for drafts.
Close the door and inspect the perimeter.
You shouldn’t see obvious gaps between the door and its frame.
Look for:
- Cracked or compressed weatherstripping
- Missing weatherstripping
- Gaps around the frame
- Light visible around the edges
- A door that doesn’t close tightly
- Gaps underneath the door
If you can feel cold air coming around the sides or top of the door, the weatherstripping may need replacement.
If the draft is coming from underneath the door, the problem may involve the threshold or door sweep rather than the weatherstripping around the frame.
3. Replace Worn Door Weatherstripping
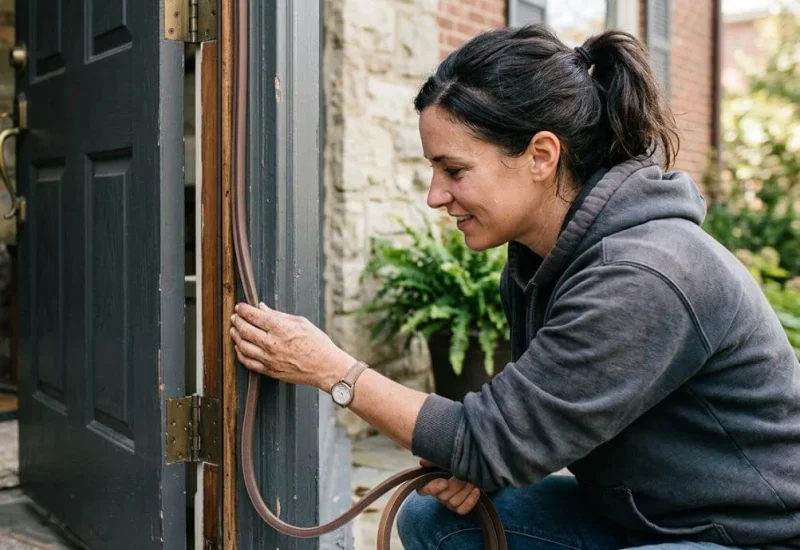
Weatherstripping creates a seal between a closed door and its frame.
Over time, it can become compressed, cracked, brittle, or detached.
Replacing it is often one of the simpler DIY winterization projects.
When purchasing replacement weatherstripping, pay attention to:
- The type of existing weatherstripping
- The size of the gap
- The door and frame configuration
- Whether the material is appropriate for exterior use
Don’t simply buy the thickest material available.
Weatherstripping that is too thick can prevent the door from closing properly or put unnecessary pressure on the door and frame.
The goal is a snug seal without interfering with normal operation.
4. Check the Bottom of Your Exterior Doors
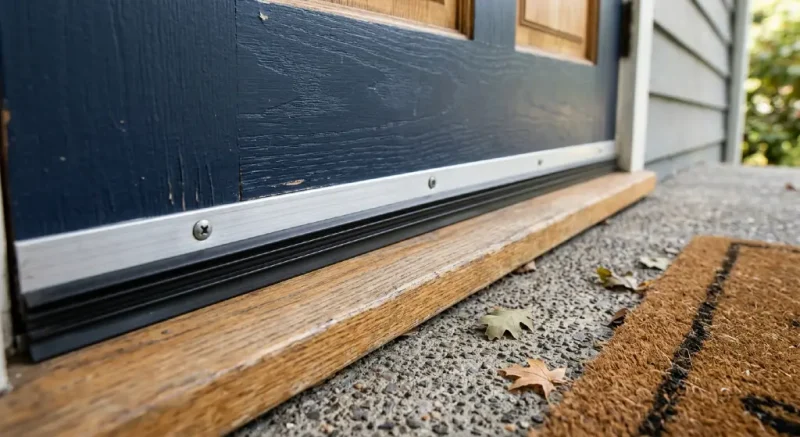
A door can have perfectly good weatherstripping around the frame and still allow cold air underneath.
That’s where a door sweep can help.
Door sweeps attach to the bottom of the door and help close the gap between the door and threshold.
Inspect the existing sweep for:
- Cracks
- Gaps
- Wear
- Missing sections
- Poor contact with the threshold
When the door is closed, the sweep should provide a reasonable seal without making the door difficult to open or close.
5. Inspect Your Door Threshold
The threshold is the area at the bottom of the doorway.
If cold air is entering beneath the door, the threshold itself may be part of the problem.
Look for:
- Visible gaps
- Damaged components
- Loose sections
- Poor adjustment
- Deteriorated seals
Some adjustable thresholds can be raised or lowered to improve the seal.
However, don’t force an adjustment if you’re unfamiliar with the mechanism. A poorly adjusted threshold can interfere with the door or create other problems.
6. Inspect Your Windows for Drafts
Next, check your windows.
Look around the entire perimeter of each window, particularly older windows.
Check for:
- Cracked caulk
- Missing caulk
- Damaged weatherstripping
- Gaps around trim
- Loose components
- Broken or damaged frames
- Noticeable cold air movement
Don’t assume every cold window means the window itself is defective.
A cold glass surface can be normal during winter. What you’re looking for is unwanted air movement through gaps or failed seals.
That’s an important distinction.
7. Re-Caulk Gaps Around Window Frames
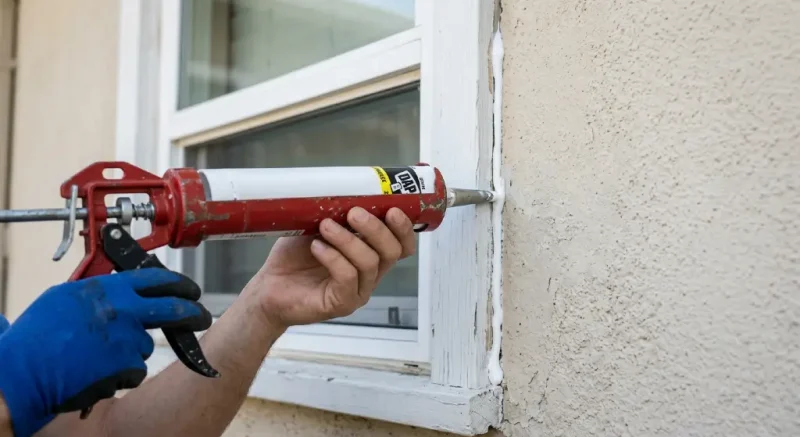
Caulk can help seal stationary gaps where window frames meet surrounding trim or other building materials.
If existing caulk has cracked, separated, or deteriorated, carefully remove the damaged material and clean the area before applying new caulk appropriate for the application.
Make sure the surface is clean and reasonably dry.
Use a caulk designed for the location and materials you’re sealing.
Don’t caulk moving parts of a window.
Windows need to open, close, and in some cases move within their frames. Sealing the wrong area can interfere with operation or drainage.
8. Don’t Block Window Drainage Paths
This is an easy mistake to make when trying to stop drafts.
Some windows are designed with drainage openings or weep holes that allow water to escape from the frame.
Don’t seal these openings simply because they look like gaps.
Blocking drainage can trap water inside the window system and potentially contribute to damage.
If you’re unsure whether an opening is designed for drainage, leave it alone until you can identify its purpose.
9. Check Sliding Patio Doors
Sliding glass doors can be a significant source of drafts, particularly in older homes.
Inspect:
- The weatherstripping
- Door edges
- The meeting point between sliding panels
- The bottom track
- The frame
- The area where the stationary panel meets the frame
Also make sure the door closes completely.
A sliding door that doesn’t close or latch correctly may have an adjustment or hardware problem rather than simply needing additional weatherstripping.
Keeping the track clean can also help the door operate properly.
10. Check Doors Leading Into the Garage
The door between your house and an attached garage deserves special attention.
The garage is typically much colder than the living space during winter, so air leaks around this door can affect comfort.
Inspect the:
- Door weatherstripping
- Door sweep
- Threshold
- Frame
- Hinges
- Latch
The door should close tightly and completely.
If you can see daylight around the perimeter when the door is closed, investigate the source.
11. Look for Drafts Around Utility Openings
Windows and doors aren’t the only places air can enter your house.
Exterior walls contain openings for plumbing, wiring, vents, cables, and other utilities.
Check accessible areas around:
- Plumbing pipes
- Electrical conduits
- Outdoor faucets
- Cable lines
- Dryer vents
- Other exterior penetrations
Small gaps around these openings may allow outdoor air into the home.
The appropriate sealing method depends on the size of the gap and the materials involved.
Never seal over a vent that is designed to provide ventilation or combustion air.
If you’re uncertain about an opening, determine what it does before sealing it.
12. Don’t Forget the Attic Access
One often-overlooked source of air leakage is the attic access panel or hatch.
Your attic is outside the home’s conditioned living envelope in many houses, so an improperly sealed access point can allow heated air to escape.
Check whether the attic access:
- Fits properly
- Has visible gaps
- Has an appropriate seal
- Is insulated when appropriate
You don’t necessarily need to make the attic access completely airtight with caulk. The appropriate solution depends on its design.
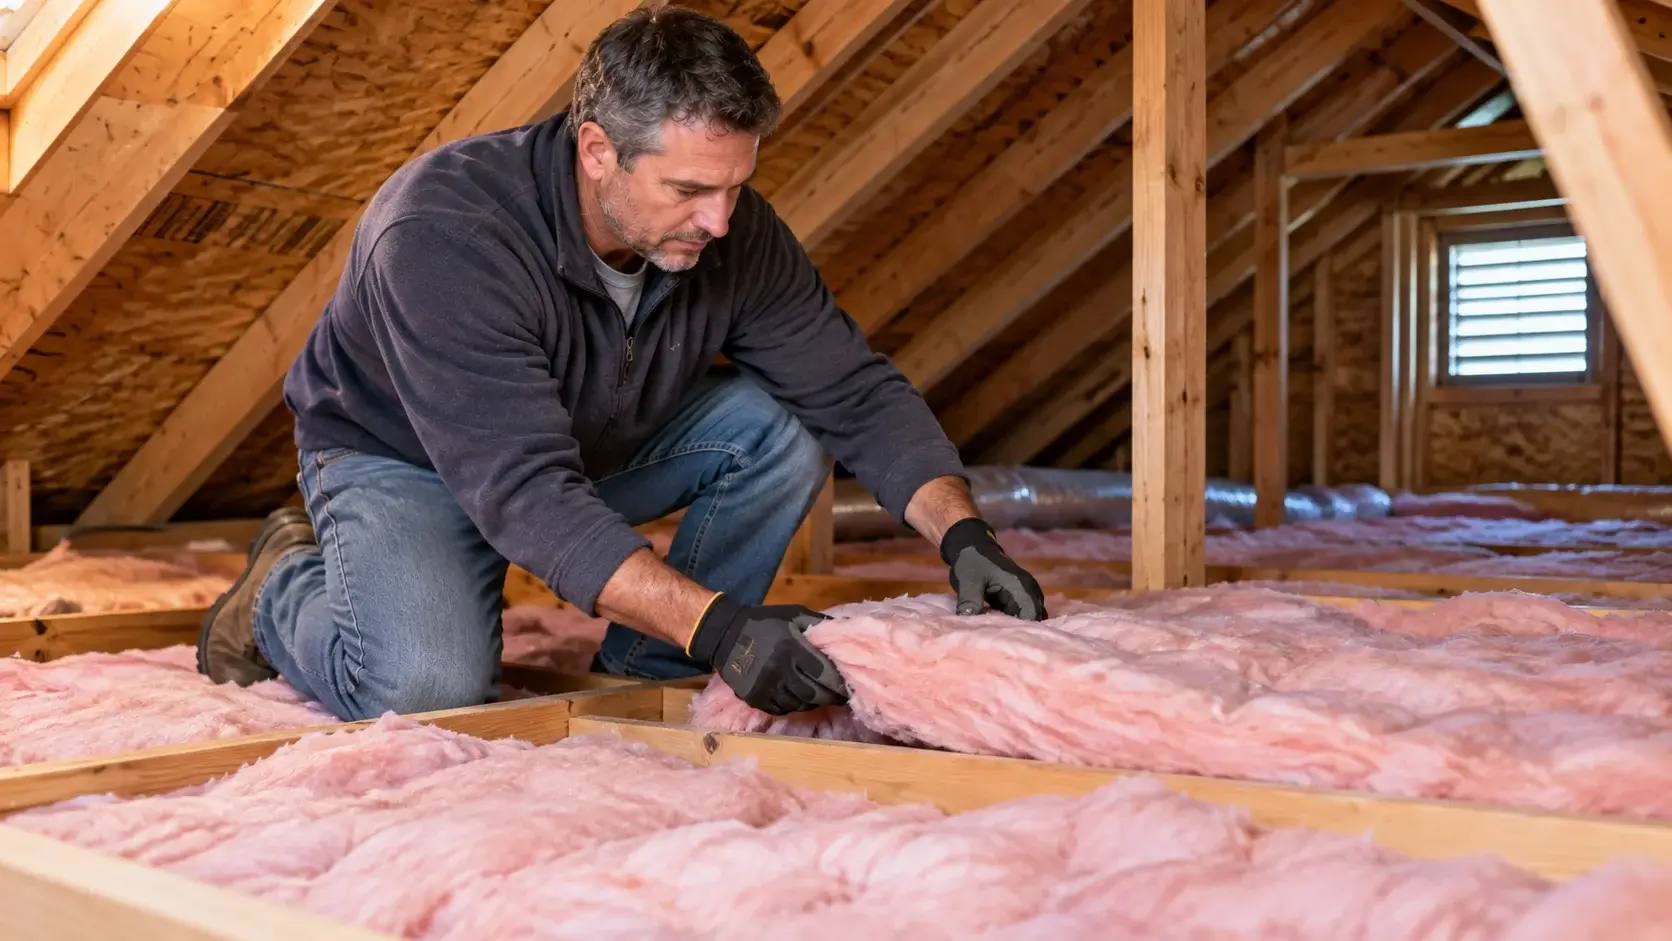
If you’re also preparing your attic for winter, inspect the insulation and ventilation while you’re there.
Don’t block soffit vents or other designed attic ventilation openings while trying to improve energy efficiency.
13. Use the Right Material for the Job
One reason DIY draft-proofing sometimes goes wrong is that homeowners use the same product everywhere.
Different problems require different solutions.
Weatherstripping
Best suited for moving components such as doors and operable windows where a flexible seal is needed.
Caulk
Generally appropriate for small, stationary gaps and joints.
Door sweeps
Designed to reduce air movement beneath exterior doors.
Backer rod and appropriate sealants
May be useful for larger joints, depending on the application.
Spray foam
Can be useful for certain larger gaps, but it expands and should be used carefully. It isn’t appropriate for every location.
Using the wrong product can create problems that are more difficult to fix than the original draft.
14. Don’t Overdo It With Caulk and Foam
More sealant isn’t necessarily better.
A common DIY mistake is filling every visible opening with caulk or expanding foam without determining what the opening is for.
Some gaps provide:
- Drainage
- Ventilation
- Expansion and movement
- Access for maintenance
- Required airflow
Before sealing anything, ask:
Is this actually an unwanted air leak, or is the opening there for a reason?
If you aren’t sure, investigate before sealing it.
15. Check for Larger Problems
Sometimes a draft isn’t caused by worn weatherstripping or a small gap.
A door may be difficult to close because the frame has shifted. A window may have deteriorated because of moisture damage. A poorly installed replacement window may have significant air leakage around the rough opening.
Watch for:
- Rot
- Water damage
- Cracked frames
- Significant gaps
- Warped doors
- Windows that won’t close properly
- Persistent condensation
- Damaged seals
- Drafts that remain after basic repairs
These problems may require more than a tube of caulk.
Temporary Fixes for Drafty Windows

If you’re dealing with particularly cold weather and can’t immediately make a permanent repair, there are temporary measures that may improve comfort.
For example, homeowners sometimes use removable window insulation film, thermal curtains, or draft-blocking products.
These can be useful as short-term measures, particularly for older windows.
But remember:
A temporary fix isn’t a substitute for repairing a damaged window or addressing a significant air leak.
If you repeatedly need temporary measures every winter, it may be worth determining whether the underlying window or installation needs attention.
What About Replacing Old Windows?
Drafty windows don’t automatically mean you need new windows.
Before spending thousands of dollars on replacement windows, determine why the existing windows are drafty.
Potential causes include:
- Failed weatherstripping
- Deteriorated caulk
- Poor installation
- Damaged frames
- Failed insulated glass seals
- Gaps around the window opening
Some problems are relatively inexpensive to repair.
Others may justify replacement.
If you’re considering replacement, compare the cost of repair with the condition, age, efficiency, and expected remaining life of the existing windows.
How to Tell If Your Door Needs Replacement
The same principle applies to exterior doors.
Replacing weatherstripping may solve a minor air leak.
But if the door is warped, damaged, poorly fitted, or deteriorated, replacing the weatherstripping alone may not solve the problem.
Consider professional evaluation if:
- The door won’t close properly
- The frame is damaged
- Significant daylight is visible around the door
- The door is warped
- Water is entering around the door
- The threshold is damaged
- Drafts remain after replacing the seals
A Simple DIY Draft Test
Want to find the worst leaks before buying supplies?
Choose a windy or cold day and slowly walk around your home’s exterior doors and windows.
Use your hand to check for noticeable air movement.
For harder-to-find leaks, a smoke pencil can help reveal air movement. A professional energy audit can provide much more comprehensive testing if you suspect your home has significant air leakage.
Make a list of problem areas and address the easiest repairs first.
You may be surprised by how many small improvements can be made without replacing an entire window or door.
Draft-Proofing Mistakes to Avoid
Sealing Everything You See
Not every gap is an air leak that should be sealed.
Using Caulk on Moving Parts
Windows and doors need to move. Don’t permanently seal areas that are designed to operate.
Blocking Window Weep Holes
Those openings may be there to drain water.
Blocking Attic Ventilation
Sealing air leaks does not mean blocking soffit vents or other intentional ventilation.
Using Too Much Expanding Foam
Expanding foam can expand considerably. Use it only where appropriate and follow the product’s instructions.
Ignoring the Underlying Problem
If a door is warped or a window frame is damaged, new weatherstripping may only mask the problem temporarily.
Waiting Until the Coldest Day
Late summer and early fall are much better times to discover and fix drafts than the middle of winter.
How Much Can Sealing Drafts Save?
Sealing air leaks can reduce energy waste and improve comfort, but there isn’t a single dollar amount you can expect to save.
The potential benefit depends on factors including:
- How leaky your home is
- Your home’s size
- Your climate
- Heating fuel and energy prices
- The condition of your windows and doors
- How much air leakage you eliminate
The biggest benefit may not always show up as a dramatic reduction in one month’s heating bill.
You may also notice that rooms feel more comfortable and that your heating system doesn’t have to compensate as much for unwanted cold-air infiltration.
When Should You Seal Drafts?
Late summer and early fall are ideal times to inspect your windows and doors.
The weather is usually still comfortable enough to work outside, and you have time to make repairs before the heating season begins.
Don’t wait until the first freezing night to discover that the back door has a two-inch gap underneath it.
Add draft inspection to your fall home-maintenance routine every year.
When Should You Hire a Professional?
Many basic weatherstripping and caulking jobs are reasonable DIY projects.
However, professional help may be worthwhile if you discover a larger problem.
Consider hiring a qualified contractor if:
- Windows are damaged or rotting.
- Door frames are deteriorated.
- Windows are improperly installed.
- Doors are warped or badly aligned.
- You have significant unexplained air leakage.
- Water is entering around windows or doors.
- You’re considering replacing windows or exterior doors.
- You want a comprehensive home energy assessment.
A professional can help determine whether you’re dealing with a simple seal problem or something more significant.




Frequently Asked Questions
On a cold or windy day, check around the edges of the window for noticeable air movement. Look for cracked caulk, damaged weatherstripping, gaps around the frame, or other visible signs of air leakage.
Start by identifying where the air is entering. Worn weatherstripping can often be replaced relatively easily, while a draft underneath the door may require a door sweep or threshold adjustment.
Caulk can be useful for sealing appropriate stationary gaps around window frames and trim. However, don’t caulk moving parts or block drainage openings designed to allow water to escape.
They serve different purposes. Weatherstripping is designed for moving components such as doors and operable windows, while caulk is generally used to seal stationary gaps and joints.
Expanding foam can be appropriate for some larger gaps, but it must be used carefully and according to the product’s instructions. Using too much or applying it in the wrong location can damage components or create other problems.
Not necessarily. Drafts can sometimes be corrected with weatherstripping, caulk, adjustments, or other repairs. Replacement may make sense when windows are badly damaged, inefficient, improperly installed, or nearing the end of their useful life.
The problem may be underneath the door, around the threshold, or related to the door’s alignment or frame. If the door doesn’t close tightly, the underlying problem may need to be repaired.
No. Don’t seal or block ventilation openings simply because they appear to let air through. Attic ventilation systems are designed to move air and should remain unobstructed.
Final Thoughts on Sealing Drafty Windows and Doors
Drafty windows and doors are easy to ignore when the weather is warm, but those small leaks become much more noticeable once winter arrives.
Fortunately, not every draft requires an expensive home improvement project.
Start by finding the source. Check your exterior doors, window frames, thresholds, weatherstripping, door sweeps, and other obvious openings. Replace worn seals, use appropriate caulk for stationary gaps, and correct simple problems before they become bigger ones.
At the same time, don’t fall into the trap of sealing every opening you can find. Some openings are intentional and provide drainage or ventilation.
And if you discover damaged frames, significant air leakage, water intrusion, or windows and doors that simply aren’t functioning properly, that’s the point where professional help can make sense.
A little preparation before winter can make your home more comfortable, less drafty, and potentially more energy efficient throughout the heating season.
Need Help With Windows, Doors or Drafts?
If you’ve tried basic weatherstripping and caulking but your home is still drafty, the problem may require professional attention.
A qualified window, door, insulation, energy-efficiency, or general home improvement contractor can help identify larger air leaks and determine whether repair or replacement is the better option.
Find a local home improvement professional in the HelpHouse Contractor Directory.
More Fall & Winter Home Maintenance
Continue preparing your home for colder weather:
Fall Home Maintenance Checklist: 25 Essential Tasks Every Homeowner Should Complete
Fall Roof Inspection Checklist: 10 Things Homeowners Should Check Before Winter
When Should You Clean Your Gutters? A Homeowner’s Fall Guide
How to Winterize Outdoor Faucets Before Freezing Weather
How to Prepare Your Home for Colder Weather: 15 Things to Do Before Winter
How to Prepare Your Furnace Before Cold Weather
How to Prevent Frozen Pipes This Winter
Coming Soon
- Simple Ways to Improve Your Home’s Insulation Before Winter
Are you a contractor?
Help homeowners find your business by listing your company in the HelpHouse Contractor Directory.