Winter is coming, and if some rooms in your home always seem colder than others, your insulation could be part of the problem.
Insulation helps slow the transfer of heat between your living space and the outdoors. In winter, that means helping keep heated air inside your home instead of allowing it to escape through the attic, walls, floors, and other parts of the building envelope.
Improving insulation can also make your home more comfortable year-round. The same insulation that helps keep heat inside during winter can help keep unwanted heat outside during summer.
Before adding insulation, however, it is important to determine where your home actually needs improvement. Insulation isn’t the only factor affecting heat loss. Air leaks, inadequate attic ventilation, moisture problems, and poorly insulated doors and windows can also affect comfort and energy efficiency.
Here’s how to evaluate your home’s insulation and determine what should be done before winter arrives.
How Do You Know If Your Home Needs More Insulation?
You don’t necessarily need to start by tearing into walls or hiring someone to inspect every part of your house.
There are several signs that can indicate your home may benefit from additional insulation or air sealing.
Look for:
- Rooms that are noticeably colder than others
- Cold ceilings or exterior walls
- Floors that feel unusually cold during winter
- Drafty areas around the house
- High heating or cooling costs
- An attic with little or uneven insulation
- Insulation that appears compressed, damaged, or missing
- Ice dams forming along the roof during winter
- Heating or cooling systems that seem to run excessively
- Large temperature differences between floors
These symptoms don’t automatically mean that insulation is the problem. Drafty windows, doors, ductwork, HVAC problems, air leaks, and moisture issues can produce similar symptoms.
If you’re unsure, a home energy assessment can help identify where your home is losing heat and which improvements are likely to make the biggest difference. ENERGY STAR recommends considering a professional energy assessment when homeowners need help identifying specific problems or potential safety concerns.
Start With Your Attic
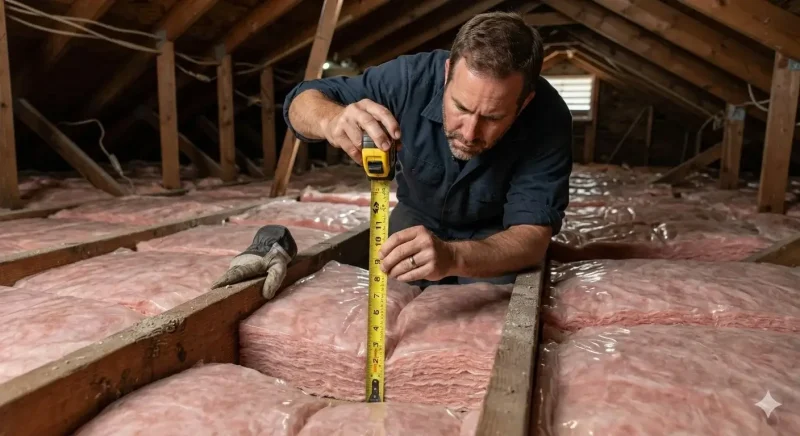
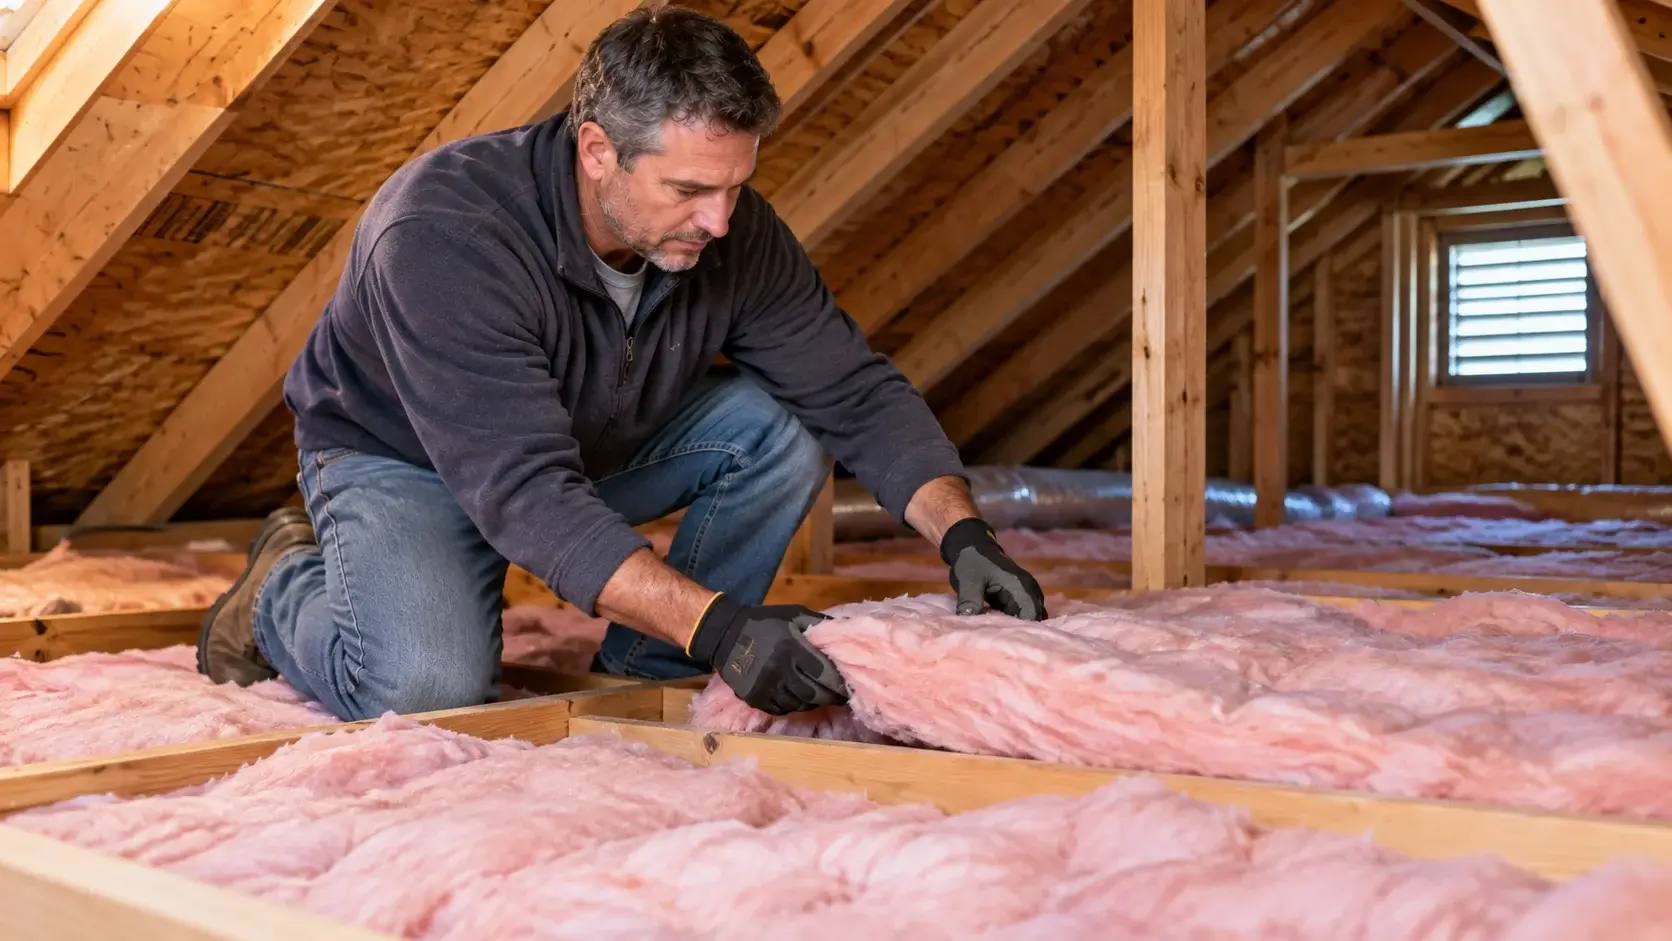
For many homes, the attic is one of the best places to look for inadequate insulation.
Warm air naturally rises, and an inadequately insulated attic can allow heat to escape through the ceiling. ENERGY STAR notes that the attic is generally one of the easiest places to add insulation and one of the areas where homeowners can find significant opportunities to improve comfort and energy efficiency.
If you can safely access your attic, look at the insulation before winter.
Check for:
- Areas with little or no insulation
- Insulation that is significantly lower than surrounding areas
- Compressed insulation
- Exposed sections of attic floor
- Wet or damp insulation
- Mold or signs of moisture
- Gaps around attic access areas
- Insulation that has been moved by animals or other activity
ENERGY STAR provides a simple rule of thumb for checking attic insulation: if the insulation is level with or below the tops of the attic floor joists and the joists are easily visible, the attic may need additional insulation. If the insulation is evenly distributed well above the joists, adding more may not be cost-effective.
Don’t assume that adding more insulation is always the answer, though. Air sealing should generally be addressed before adding attic insulation.
Air Sealing and Insulation Are Not the Same Thing
One of the most important things to understand before improving your insulation is that insulation and air sealing solve different problems.
Insulation slows heat transfer.
Air sealing reduces the movement of air through cracks, gaps, and openings in your home’s building envelope.
A home can have plenty of insulation and still lose heated air through gaps around plumbing pipes, wiring, recessed lights, attic hatches, dropped soffits, and other openings.
ENERGY STAR recommends sealing attic air leaks before adding insulation because it is easier to address those openings before they are buried under additional insulation.
Common areas to inspect include:
- Around plumbing pipes
- Around electrical wiring
- Around the attic access hatch
- Around recessed lights
- Around chimneys and flues
- Around duct penetrations
- Where walls meet the attic floor
- Behind attic kneewalls
- Around dropped soffits
- Around other openings through the ceiling
Some smaller gaps can be sealed with appropriate caulk or expanding foam, but larger openings and areas around heat-producing equipment may require different materials and methods.
If you aren’t sure what can safely be sealed, have a professional evaluate it.


Check Your Attic Access Door or Hatch
The attic access opening is easy to overlook.
Even if the rest of your attic is properly insulated, an uninsulated or poorly sealed attic hatch can allow warm air to escape into the attic.
Check the hatch or access panel for:
- Gaps around the frame
- Missing weatherstripping
- Little or no insulation on the hatch
- A panel that doesn’t close tightly
An appropriate gasket or weatherstripping can help reduce air leakage around the opening. The access panel itself can also be insulated when appropriate.
If you have pull-down attic stairs, there are insulated covers specifically designed for this purpose.
The U.S. Department of Energy’s Building Science Education resources recommend air sealing attic access openings and using an insulated cover where appropriate.
Don’t Block Your Attic Ventilation

This is an important mistake to avoid when adding insulation.
More insulation does not mean you should simply fill every available space in the attic.
Many attics are designed to allow outside air to enter through soffit vents and move through the attic ventilation system.
When adding insulation near the eaves, make sure you don’t block the soffit vents.
ENERGY STAR specifically warns homeowners never to cover attic soffit vents with insulation. Rafter vents or baffles can be used where appropriate to maintain airflow between the soffits and the attic.
Proper insulation and proper attic ventilation work together.
In winter, ventilation helps keep the attic cold while insulation and air sealing help prevent heat and moisture from the living space from entering the attic. This combination can also help reduce conditions that contribute to ice dams.
How Much Attic Insulation Do You Need?
Insulation effectiveness is commonly described using R-value.
R-value measures resistance to heat flow. Generally, a higher R-value means greater resistance to heat transfer.
The amount of insulation recommended depends on factors including your climate zone, the part of the home being insulated, and the type of insulation.
Don’t simply judge insulation by how many inches you see. Different insulation materials provide different levels of thermal resistance for a given thickness.
For example, ENERGY STAR notes that recommended attic insulation levels can vary by material and provides R-value guidance rather than relying solely on insulation depth.
If you’re planning a major insulation project, determine the recommended R-value for your location and the specific part of your home before purchasing materials.
What About Insulating Your Walls?
Attic insulation is often the easiest place for homeowners to inspect, but walls can also contribute to heat loss.
Older homes in particular may have little insulation in exterior walls or insulation that has settled, deteriorated, or was never installed properly.
Unfortunately, determining what’s inside a finished wall isn’t always easy.
If you’re remodeling a room, replacing siding, or otherwise opening an exterior wall, that can be an opportunity to evaluate and improve the insulation.
For finished walls that aren’t being opened, a professional insulation contractor can determine whether additional insulation can be added and which method is appropriate.
Don’t start cutting holes in finished walls simply because one room feels cold. First rule out easier explanations such as air leaks, windows, doors, ductwork, or HVAC problems.
Insulate Floors, Crawl Spaces and Basements
Heat can also escape through floors, particularly when a home has an unconditioned crawl space or an unfinished basement.
If you have cold floors above a crawl space, the crawl space and floor assembly deserve attention.
Your home’s design determines the appropriate insulation approach. In some homes, insulation is installed between floor joists above a crawl space. In other situations, the crawl space itself may need to be addressed as part of a larger moisture and air-sealing strategy.
Before adding insulation to a crawl space, look for moisture problems, standing water, plumbing leaks, mold, or inadequate ventilation.
Adding insulation over an existing moisture problem doesn’t solve the underlying problem and can sometimes make it more difficult to identify later.
If your basement is unfinished, the walls and rim joists may also deserve attention.
Because basement and crawl-space insulation can involve moisture control and building-envelope issues, this is an area where professional advice can be particularly useful.
Don’t Forget Pipes and Other Vulnerable Areas
Insulation isn’t only about keeping your living spaces warm.
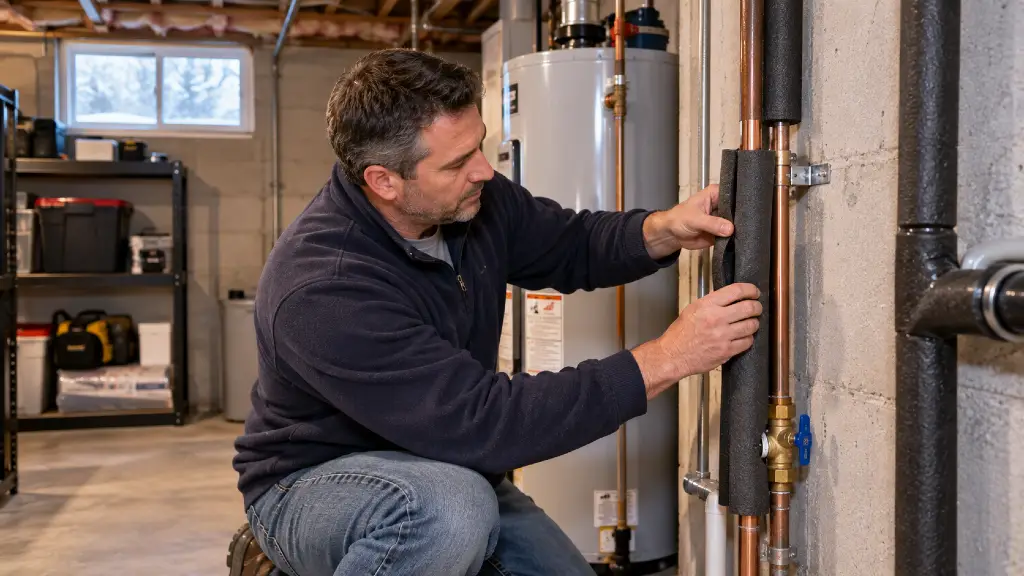
Insulating vulnerable plumbing can help reduce the risk of frozen pipes during periods of extreme cold.
Pay particular attention to pipes located in:
- Unheated crawl spaces
- Exterior walls
- Garages
- Basements
- Attics
- Other poorly insulated areas
Pipe insulation is different from insulating your home’s walls or attic, but it is another useful winter preparation project.
For more information, see our guide:
How to Prevent Frozen Pipes This Winter (and What to Do If They Freeze)
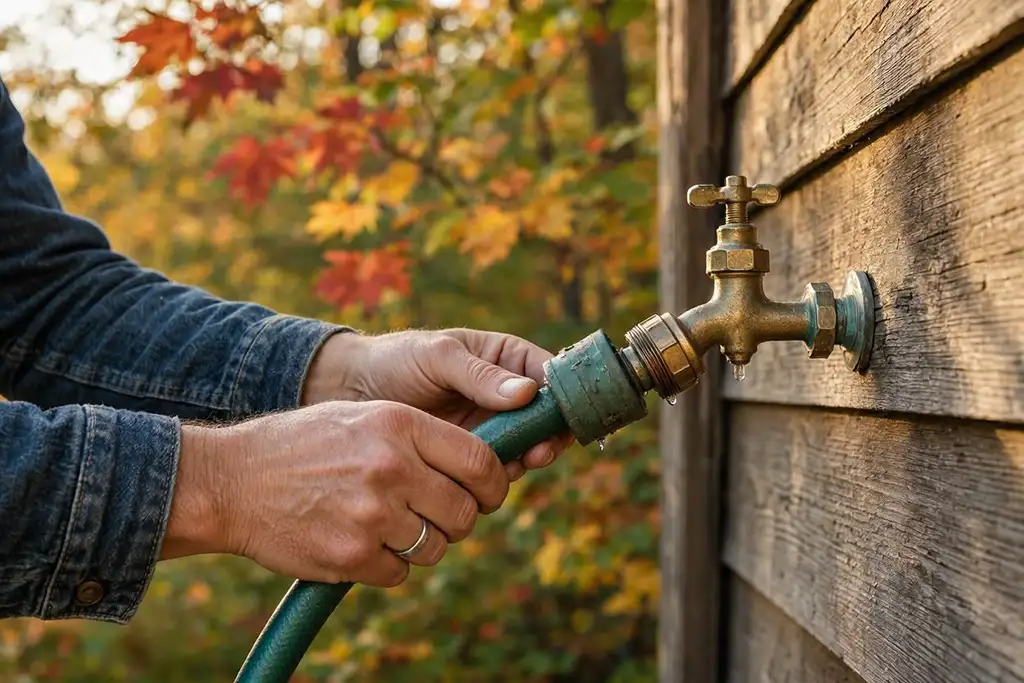
You should also make sure outdoor plumbing has been properly winterized before freezing weather arrives.
See:
How to Winterize Outdoor Faucets Before Freezing Weather
What About Windows and Doors?
Insulation isn’t the only way to reduce heat loss.
If you can feel cold air entering around an exterior door or window, the problem may be an air leak rather than inadequate wall insulation.
Check:
- Window caulking
- Window weatherstripping
- Door weatherstripping
- Door thresholds
- Gaps around frames
- Damaged seals
Some of these repairs are inexpensive DIY projects.
If you haven’t already done so, see our guide:
How to Seal Drafty Windows and Doors Before Winter
A combination of insulation and air sealing can make a noticeable difference in comfort because you’re addressing both heat transfer and unwanted air movement.
Should You Replace Old Insulation?
Not necessarily.
Old insulation isn’t automatically bad insulation.
If existing insulation is dry, clean, and in reasonably good condition, it may be possible to add additional insulation over it rather than removing it.
ENERGY STAR notes that existing insulation generally does not need to be removed simply because it is old, provided it isn’t wet, moldy, smelly, or contaminated with animal waste.
However, damaged insulation should be evaluated before you cover it with new material.
Look for:
- Water damage
- Mold
- Animal waste
- Significant deterioration
- Pest infestations
- Areas where insulation has become badly compressed
The source of moisture or contamination should be addressed first.
When Should You Hire an Insulation Contractor?
Adding insulation can be a reasonable DIY project in some situations, particularly when the attic is accessible and the work can be performed safely.
But there are situations where bringing in a professional is the better option.
Consider hiring an insulation or home-energy professional if:
- Your attic is difficult or dangerous to access
- You find wet insulation
- You see mold or rotted wood
- Your roof appears to be leaking
- Your attic has inadequate ventilation
- You have complicated electrical wiring
- You discover old vermiculite insulation
- You aren’t sure which insulation is appropriate
- You need insulation added inside finished walls
- You have persistent cold rooms despite adequate insulation
- You want a complete evaluation of your home’s energy efficiency
ENERGY STAR specifically recommends professional assistance when homeowners encounter conditions such as wet insulation, mold or rotted framing, inadequate attic ventilation, certain older wiring, or difficult attic access.

A Special Warning About Vermiculite Insulation
If you discover loose, lightweight, flaky insulation that looks like small pieces of gray or silver material, don’t disturb it until you know what it is.
Some older vermiculite insulation may contain asbestos.
ENERGY STAR recommends having suspected vermiculite insulation tested before disturbing it.
If you’re unsure about an older insulation material, stop and get professional advice rather than removing it yourself.
Need Help Improving Your Home’s Insulation?
If your home needs significant insulation work, air sealing, or an evaluation of the attic, this is a good time to contact a qualified insulation or home-energy professional.
A contractor can evaluate your existing insulation, identify areas where heat is escaping, check for moisture or ventilation problems, and recommend the appropriate type and amount of insulation.
Looking for a home improvement professional? Browse the HelpHouse contractor directory to find contractors who can help with insulation, energy-efficiency improvements, and other home projects.
Can You Improve Your Home’s Insulation Yourself?
Some insulation projects are reasonable DIY jobs, but that doesn’t mean every insulation project should be handled by a homeowner.
Projects that may be suitable for experienced DIY homeowners:
- Inspecting accessible attic insulation
- Adding weatherstripping
- Sealing small, appropriate air gaps
- Insulating an attic hatch
- Adding insulation in an accessible attic
- Insulating accessible plumbing
- Checking for obvious areas of missing insulation
Projects that may require professional help:
- Attic air sealing involving difficult areas
- Large insulation projects
- Insulating finished walls
- Crawl-space insulation involving moisture problems
- Removing potentially contaminated insulation
- Working around complicated electrical systems
- Correcting attic ventilation problems
- Working around chimneys, flues, or other heat-producing equipment
Safety should come before savings. If you aren’t comfortable working in an attic or crawl space, there’s no reason to take unnecessary risks simply to complete a project yourself.
Home Insulation Checklist
Before winter arrives, walk through your home and check the following:
☐ Check the amount and condition of attic insulation
☐ Look for areas where insulation is missing or uneven
☐ Check the attic for moisture or roof leaks
☐ Inspect the attic access hatch or door
☐ Look for obvious attic air leaks
☐ Make sure soffit vents aren’t blocked by insulation
☐ Check exterior walls and rooms that consistently feel cold
☐ Inspect floors above unconditioned crawl spaces
☐ Check basement and crawl-space areas for moisture problems
☐ Insulate vulnerable plumbing where appropriate
☐ Check windows and doors for drafts
☐ Seal appropriate air leaks
☐ Don’t disturb suspected vermiculite insulation
☐ Consider a professional energy assessment if you’re unsure where heat is being lost
☐ Schedule professional insulation work before winter if necessary
Frequently Asked Questions About Home Insulation
For many homes, the attic is one of the best places to start because heat can escape through an inadequately insulated ceiling. Check the existing insulation and air leaks first rather than simply adding more material.
Look at the insulation across the attic rather than checking only one spot. If it is level with or below the tops of the floor joists and the joists are easily visible, additional insulation may be needed. If insulation is evenly distributed well above the joists, you may already have adequate coverage
In an attic, air sealing should generally come first. Sealing gaps before adding insulation prevents you from burying air leaks beneath the new insulation and allows you to address the building envelope more effectively.
Not by itself. Insulation slows heat transfer, while air sealing addresses unwanted air movement through cracks and openings. If you have noticeable drafts, you may need to address air leaks as well as insulation.
Often, yes. Existing insulation doesn’t necessarily need to be removed simply because it is old. If it is dry and in good condition, additional insulation may be installed over it when appropriate. Wet, moldy, contaminated, or otherwise damaged insulation should be evaluated first.
Adding insulation isn’t simply a matter of filling every available space. In an attic, insulation must be installed correctly without blocking required ventilation at the eaves. Improper installation can interfere with attic airflow and contribute to moisture or ice-dam problems.
Yes. Insulation helps slow heat transfer in both directions. The same insulation that helps keep heated air inside during winter can help keep outdoor heat from entering your home during summer.
If you’re unsure where your home is losing energy, a professional home energy assessment can be useful. It can help identify air leaks, insulation deficiencies, and other problems so you can prioritize improvements instead of guessing. ENERGY STAR recommends considering an energy assessment when homeowners need help identifying the most appropriate solutions.
Final Thoughts for Improving Your Home’s Insulation
Improving your home’s insulation before winter doesn’t necessarily mean replacing all of the insulation in your house.
Start by figuring out where your home is actually losing heat. The attic is often a good place to begin, but don’t overlook air leaks, crawl spaces, basements, exterior walls, windows, doors, and vulnerable plumbing.
Most importantly, don’t simply pile new insulation on top of an existing problem. Check for moisture, roof leaks, inadequate attic ventilation, and significant air leaks first. Air sealing and insulation work together, and both need to be done correctly.
If the work is straightforward and you’re comfortable doing it safely, some insulation improvements can be DIY projects. For larger projects or situations involving moisture, ventilation, wiring, older insulation, or difficult access, a qualified professional can help determine the right approach.
Getting these problems addressed before the first serious cold snap can make your home more comfortable throughout the winter—and may help reduce unnecessary heat loss for years to come.
Continue Your Fall & Winter Home Maintenance
Continue learning with these related HelpHouse guides:
- How to Prepare Your Home for Colder Weather: 15 Things to Do Before Winter
- How to Seal Drafty Windows and Doors Before Winter
- How to Prevent Frozen Pipes This Winter (and What to Do If They Freeze)
- How to Prepare Your Furnace for Winter
- Fall Roof Inspection Checklist: 10 Things Homeowners Should Check Before Winter
Are you a contractor?
Help homeowners find your business by listing your company in the HelpHouse Contractor Directory.